- Latest
- Featured
- All Recipes
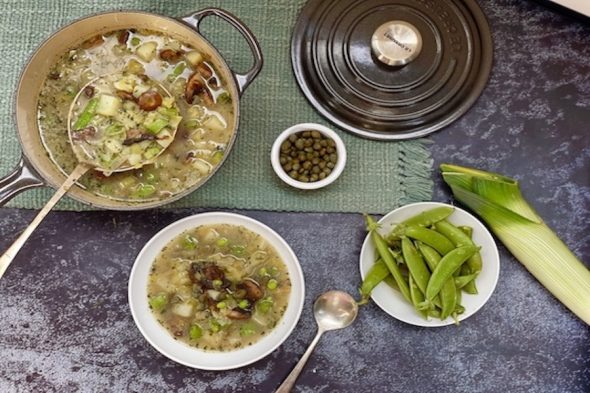
Fines Herbes Potato Leek Soup
This soup is simple and lets this blend shine. Fines Herbes is a classic French blend of garden herbs like chervil, tarragon, chives and parsley. These delicate herbs season all of the vegetables and give …
View Full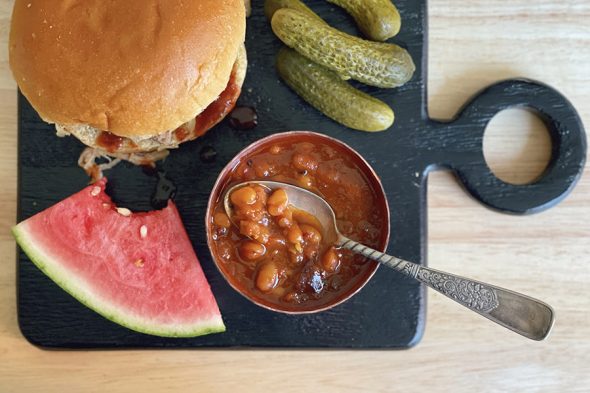
BBQ Baked Beans
Baked beans are a BBQ’s BFF, so treat them right and start with dried beans and a Dutch oven for the best results. The cooking takes a while, but you’ll easily have this super hearty …
View Full
Banana Fritters with Voatsiperyfery Sugar
Banana Fritters are an indulgent treat and the perfect flavor canvas for a sprinkle of voatsiperifery sugar. A wild, single origin pepper from the rainforest of Madagascar, voatsaperifery is aromatic and floral on the nose, …
View Full
Voatsiperifery Macerated Berries
Voatsiperifery is a rare find, a single-origin pepper variety found in the rainforests of Madagascar. It’s not just fun to say! It has a dazzling array of flavors, from floral and camphor notes to a …
View Full
Portuguese Vinho Verde Mussels
Crisp and fresh Vinho Verde is a classic Portuguese wine, an ideal choice to pair with A Taste of Portugal. Inspired by the childhood flavor memories of our friend David Leite, this blend is an …
View Full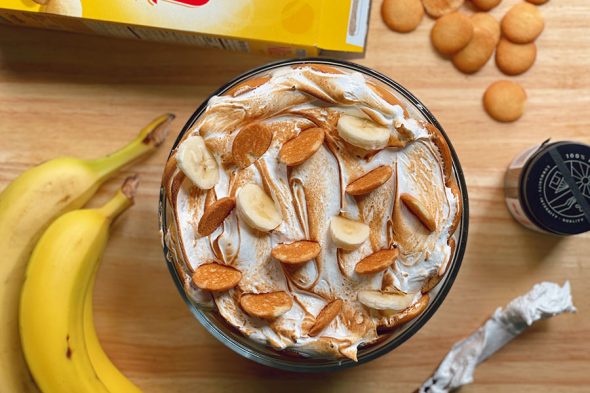
Heavenly Banana Pudding
Popularized by Nabisco in 1927, this classic dessert remains a nostalgic favorite after nearly 100 years. Every family has a version. Our latest is light as angels wings with home made vanilla meringue, amped up …
View Full
Tipsy Daisy
Imagine yourself in a field of flowers. It’s the best day of your life. Surrounded by loved ones, soaking up California sunshine and overwhelmed with joy. What would you like to sip on? While dreaming …
View Full
Heilala Vanilla Vegan Ice Cream
Here’s a simple vegan ice cream that is velvety smooth and creamy, even without the dairy. It is a spectacular flavor canvas and you can take it in any direction, but we went classic with …
View Full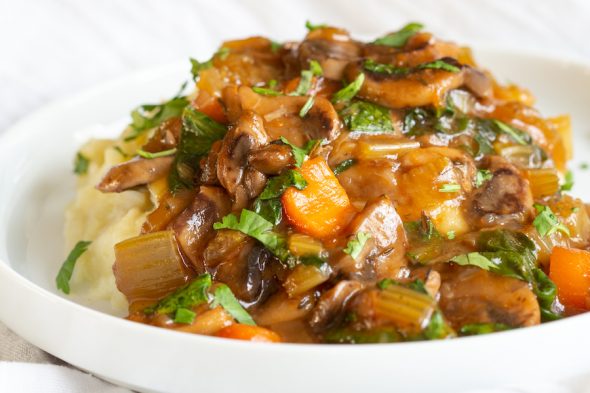
Vegan Richa’s Mushroom Bourguignon with Potato-Cauliflower Mash
Our friend Richa Hingle is a genius. She came up with a popular vegan bourguignon that is savory, hearty, and EASY! Like throw it all together in the Instant Pot in 30 minutes-easy! Sometimes we …
View Full
Vegan Richa’s Instant Pot Fried Rice
Fried rice is an easy satisfying meal and using an Instant Pot makes it even easier for days when we are short on time. It is also a great way to use up any leftover …
View Full
Vegan Richa’s Instant Pot Lentil Keema with Peas
We love using our Instant Pot! It’s useful for so many recipes, and can be used any time of the year. We especially love using it during the hot summers when you don’t want to …
View Full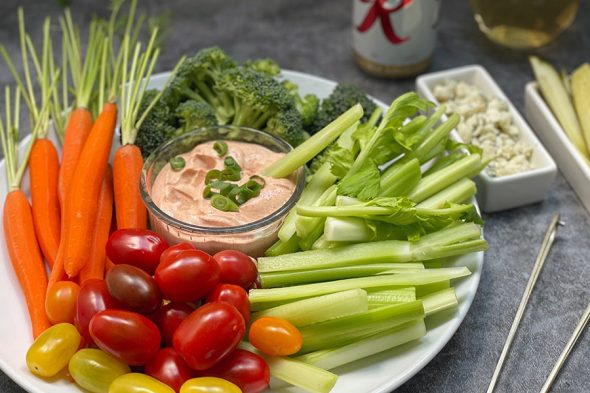
Sour Cream Buffalo Dip
Whipping up a snack on the fly doesn’t have to be stressful. Our new Buffalo Spice makes for an easy dip for crudités, and you can control the kick from the Buffalo, making it as …
View Full
Buffalo Blue Cheese Chicken Salad
This salad has converted me into a Buffalo fan. Never one for super hot wings or over-the-top heat, I just never paid it very much attention. But you can’t pigeon hole Buffalo with wings. It’s …
View Full
Buffalo Totchos
In the realm of culinary fusion, which can admittedly be hit or miss, “totchos” are a stroke of pure pub-fare genius. Universally beloved- the combination of tater tots and nachos are proof positive that good …
View Full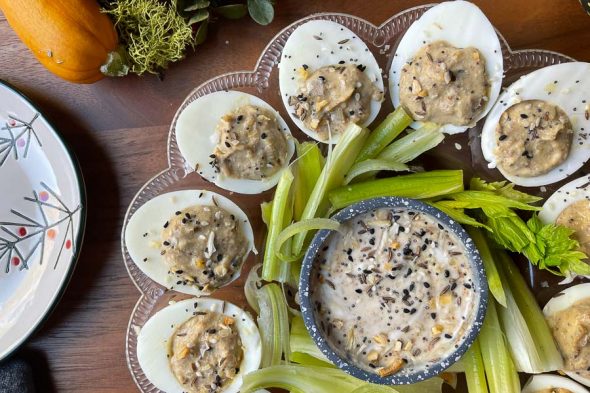
Mustard Deviled Eggs
The holiday appetizer scene wouldn’t be complete without a plate of Deviled Eggs. With these we put Classic Mustard center stage and used our Everything Bagel Spice as the topper. The flavor is robust and …
View Full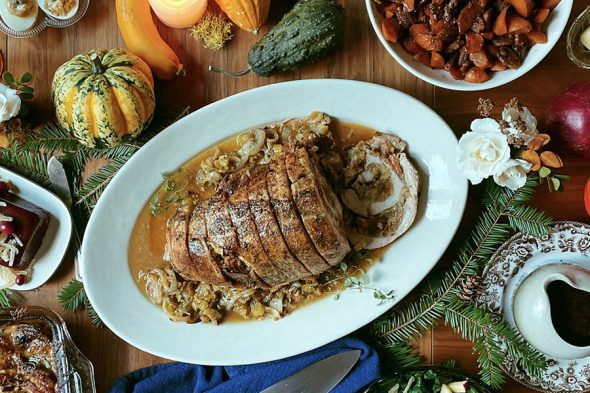
Cascade Turkey Roulade
After years of grilling the turkey, we decided to try something entirely new this year. Inspired by the bounty of the Pacific Northwest, we created a menu to showcase regional flavors with this delicious turkey …
View Full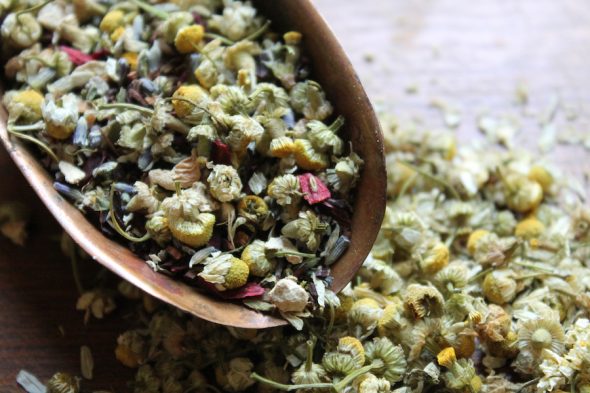
Oxymels: Tart and Sweet Elixirs
Many people are curious about the health benefits of spices. As a culinary store we tend to focus more on the abundance of flavors that our spices impart than on their medicinal benefits, but with …
View Full
Chicken & Dumpling Casserole
If you’re looking for a not-too-guilty pleasure to enjoy on a cold winter night, look no further. This hearty dish satisfies all the comfort food cravings, and is made lighter but no less luscious with …
View Full
Bulgogi Caramel Corn
Celebrate in style! This treat is a great way to add festive flavor to the Lunar New Year party or your next movie night. Heat meets sweet in our Bulgogi Spice, and paired with the …
View Full
Rose 75 Cocktail
Blending the tart flavor of sumac and the heady sweetness of rose, this cocktail tickles the palate with a full spectrum of flavors. As is so often the case, we perfected the recipe by happy …
View Full
Smoky Roast Chicken with Voodoo White BBQ Sauce
White BBQ Sauce? Yes, really! A base of vinegar, mayonnaise and horseradish whip together for a traditional southern sauce on smoked chicken. Add our Voodoo to the mix and you’ve really got some spell-binding flavor! …
View Full
Asian Tea Glazed Duck Breast
This Asian Tea Glazed Duck Breast is the perfect dish to celebrate the Lunar New Year. The glaze is seasoned with our Asian Tea Rub, combining bold, pine-smoked lapsang souchong, tea with hints of cinnamon, …
View Full
Scary-Good Shortbread Cookies
Boo! Now THIS is playing with food. Let your creativity run wild, or scary, or holiday with this simple shortbread recipe. There are endless flavor combinations. The shortbread is buttery and not too sweet which …
View Full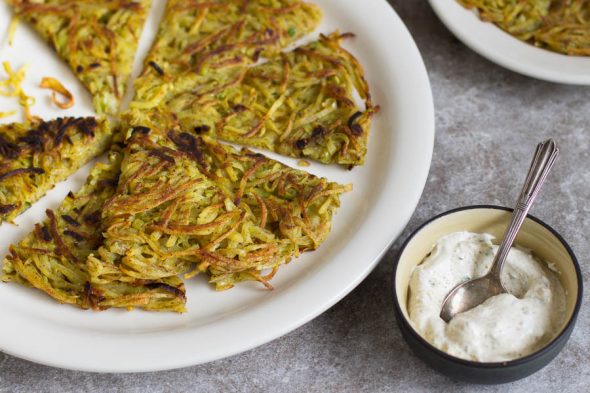
Georgian Potato Pancakes
Potato pancakes come in many forms but all need embellishment of some kind, right? They have to be a vehicle for something, and in this case it’s Khmeli Suneli, a traditional Georgian spice blend. With …
View Full
Eggnog Chiffon Pie
One sure sign that winter has arrived is the appearance of eggnog in the grocery stores. We’re going to use that distinctive flavor here in this light and airy Eggnog Chiffon Pie, but we’ll also …
View Full
Mexican Street Corn
Full of flavor and a crowd pleasing party food, Mexican Street Corn has become a seasonal favorite. The rich roasted corn topped with creamy sauce is the perfect base for our Yucatan Rojo Rub. The …
View Full
Cauliflower Tortillas
Sorry corn, I love you, but I don’t need you anymore. I have a new BFF – and it’s name is cauliflower. Please don’t be jealous – you’ll always have a place in my kitchen, …
View Full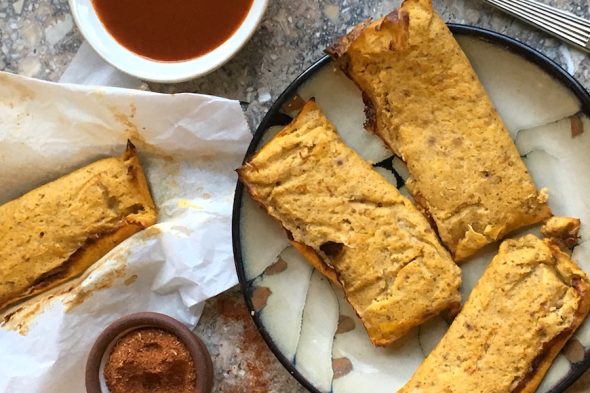
Grain-Free Yucatan Tamales
What could be more enticing than a tender, fragrant home-made tamale? Pillowy soft steamed masa on the outside, secret pockets of glorious filling and sauce on the inside. Home-made food is all about the love, …
View Full